- 7.1.1 Working Directory
- 7.1.2 User's Guide Path
- 7.1.3 File Access Mode
- 7.1.4 Text Font
- 7.1.5 Image Options
- 7.1.6 Data Options
- 7.1.7 Number of Open Objects
7.1 General Settings
HDFView comes with an array of configurable options that determine the way it operates on or displays data. These can be changed by clicking on "User Options" from the Tools menu. This section describes the general HDFView options.

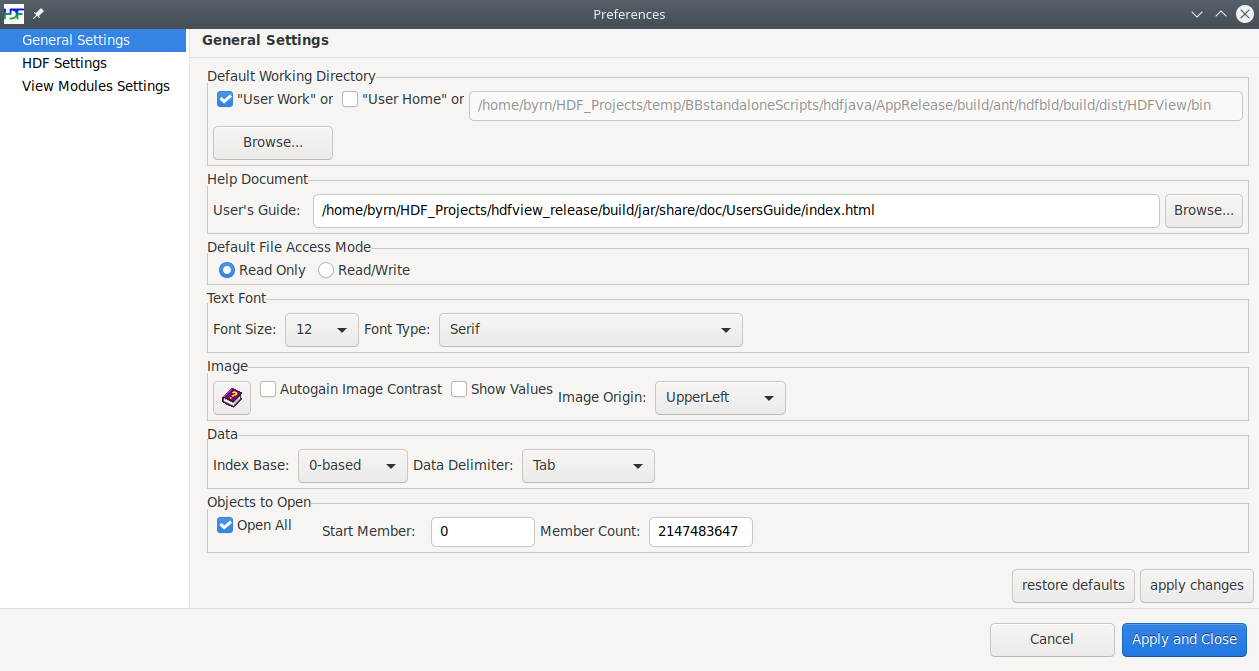
User Options General Settings
Upon exit, HDFView saves all the current settings to a properties file in the user's home directory. The file's name follows the format '.hdfview{version number}' where version number is the current version number of HDFView.
7.1.1 Default Working Directory
Initial Working DirectoryInitially, HDFView will open with the working directory for a file search dialog being set to the path specified by this section.
-
- If HDFView is started with the system property, hdfview.workdir,
defined on the command line invocation of HDFView;
java ... -Dhdfview.workdir="some/path" ... -
If HDFView is started with the argument, startDir, on the command line invocation of HDFView;
java ... hdf.view.HDFView startDir=some_location "ARGS"
- If HDFView is started with the system property, hdfview.workdir,
defined on the command line invocation of HDFView;
- If "User Work" is selected, HDFView will open with the working directory for a file search dialog set to the folder specified by a system property, user.dir.
- If "User Home" is selected, HDFView will open with the working directory for a file search dialog set to the folder specified by a system property, user.home.
- If neither of the "User" check boxes are selected, then HDFView will open with the working directory for a file search dialog set to a directory specified in the text field entry box. By default, this will be the system property, user.dir, which is usually the current user location where HDFView was launched. There is a browse button available to select a different folder.
Active Working Directory
Thereafter, HDFView will open with the working directory for a file search dialog being set to the path specified in the text field under this section.
- The initial working directory as described above.
- The directory used to load a file specified as an argument on the command line invocation of HDFView. java ... hdf.view.HDFView startDir=some_location "ARGS"
- A location saved in the HDFView property file, .hdfview3.1.2 in the user home directory. work.dir=dir_path This is property is only set by using the "User Options" dialog.
- The last directory used to load a file using the HDFView file search dialog.
- Using the "User Options" dialog to reset the working directory:
- To the user home directory.
- To the system identified working directory.
- To a directory selected by the user using a file system browse dialog or typed into a text box.
7.1.2 User's Guide Path
This section contains a single field which holds the path to the HDFView User's
Guide. The path can either be entered as an absolute file name, file path,
or URL to a remote file, or the browse button can be used to locate the guide from
the filesystem. When the user clicks the  icon on
the tool bar, the program goes to the path specified here and opens the User's Guide
if it is able to locate it.
7.1.3 File Access Mode
By default, HDFView opens files in editing mode, allowing both reading and writing to files, as well as the ability to save changes. However, by changing the default mode to read only, the user can force HDFView to open all files as read-only, disabling editing and preventing changes to opened files.
7.1.4 Text Font
Under this section, the user can specify what size of font, as well as font type, to use. The newly selected font takes place immediately and affects all text displayed inside HDFView.
7.1.5 Image Options
The "Autogain Image Contrast" option here calculates a gain and bias combination that
stretches images to match with the graphics system's pixel values. Further information
is provided by the  icon in the User Options.
The "Show Values" option enables showing the values of individual pixels in an image. While this option is selected, moving the cursor over a pixel of an image inside the ImageViewer will display that pixel's location (in relative terms from the origin), as well as the value of the pixel.
The Image Origin dropbox in this section allows the user to select which of the four corners, Upper left, Upper right, Lower left or Lower right, to use as the origin for images.
7.1.6 Data Options
The Index Base determines whether indexed objects, such as numbered cells or the coordinates of an image's origin, should start with 0 or 1 as the first index.
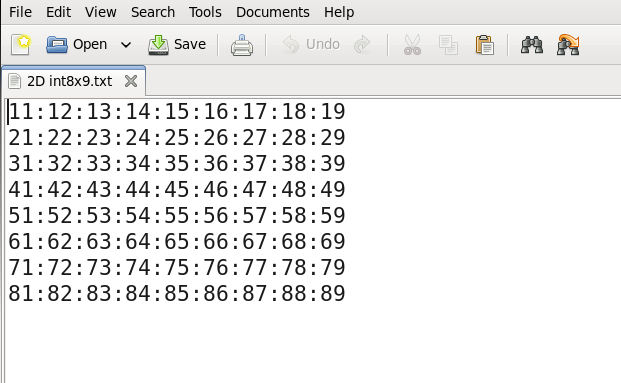
The Data Delimiter section allows the user to select a character to use as a separator for data when performing operations such as saving data to a file, importing data from a file or copying/pasting data between HDFView and other applications. The delimiter selected will be appended to data written to files, as shown below. Note: When importing data from a file, the user must know the delimiter used for the file, else data may not be able to be imported properly.

Dataset saved to file with ':' delimiter
7.1.7 Number of Open Objects
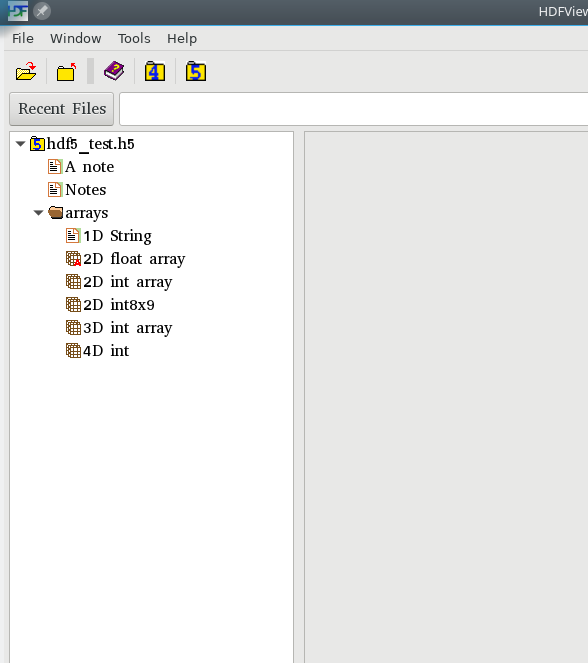
By default, HDFView loads all objects in a file upon loading the file. In some cases, however, it is useful to load a subset of the objects. To do so, first click on "Open All" in the "Objects to Open" section to unselect it, then pick a suitable start member (with member 0 being the root group) and the number of members to load in total. Note: Groups count towards the member count, as does the root group.

Start Member = 0, Member Count = 10
7.2 HDF Settings
HDFView comes with an array of configurable options that determine the way it operates on or displays data. These can be changed by clicking on "User Options" from the Tools menu. This section describes the HDF format specific options.

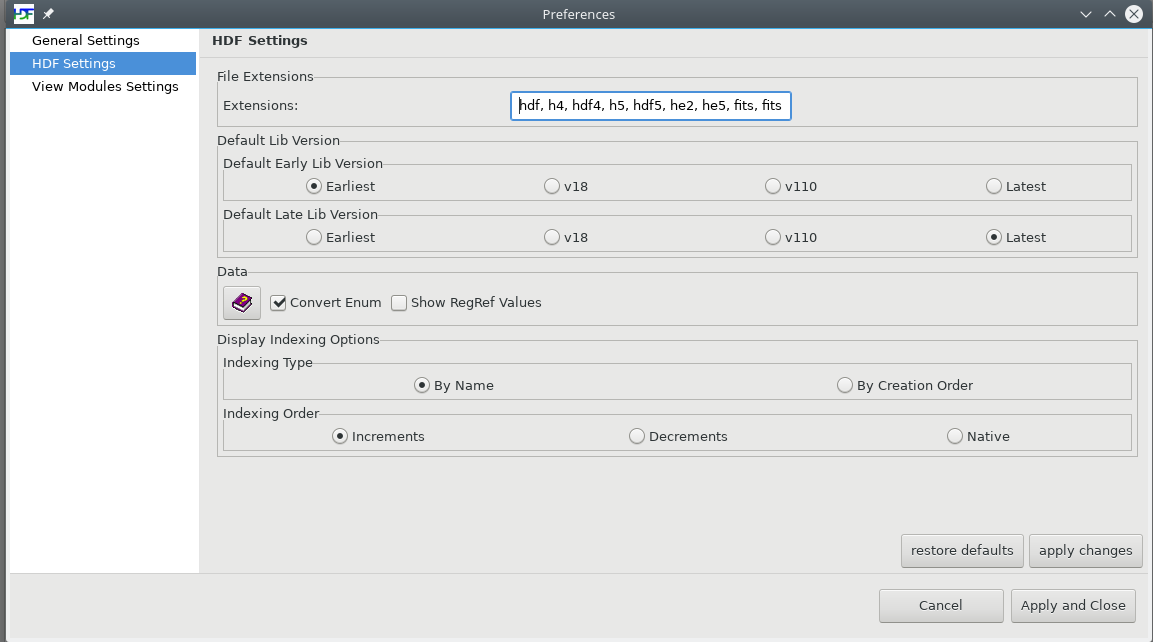
User Options HDF Settings
7.2.1 File Extensions
The text field located here displays a list of all file formats currently recognized by HDFView. This is used when choosing a file to open, as HDFView will look for and show files that have an extension matching any from this list. If needed, the user can type into this field and add their own file types for HDFView to look for.
7.2.2 Library Versions
Here the user can choose which version, the earliest version or latest version, of the HDF5 library to be used as the default when creating objects.
7.2.3 Data Options
The "Convert Enum" option enforces conversion of enum type data into a string equivalent.
Further information is provided by the  icon next to the
"Convert Enum" option.
"Show RegRef Values" allows the user to see the data pointed to by a Dataset Region Reference inline with the selected reference. If this option is not selected, the user must right click on a region reference and choose to display as a table or image in order to view the associated data.
7.2.4 Display Indexing
Display Indexing options change the order in which objects are displayed in the HDFView TreeView panel.
The Indexing Type determines the way in which the objects get sorted. Objects can either be sorted by name or by the order in which they were created.
Indexing Order further sorts the objects by ascending or descending order. If "Increments" is chosen, objects that would come first after sorting will be displayed at the top of the TreeView, with all following objects arranged below. If "Decrements" is chosen, these objects would instead be displayed at the bottom of the TreeView, with all following objects arranged above.

User Options Modules Settings
7.2.1 Module Extensions
The fields located here allow other data display methods to be used for the standard views. A separate document explains the requirements for these modules.
[Index] [1] [2] [3] [4] [5] [6] [7]